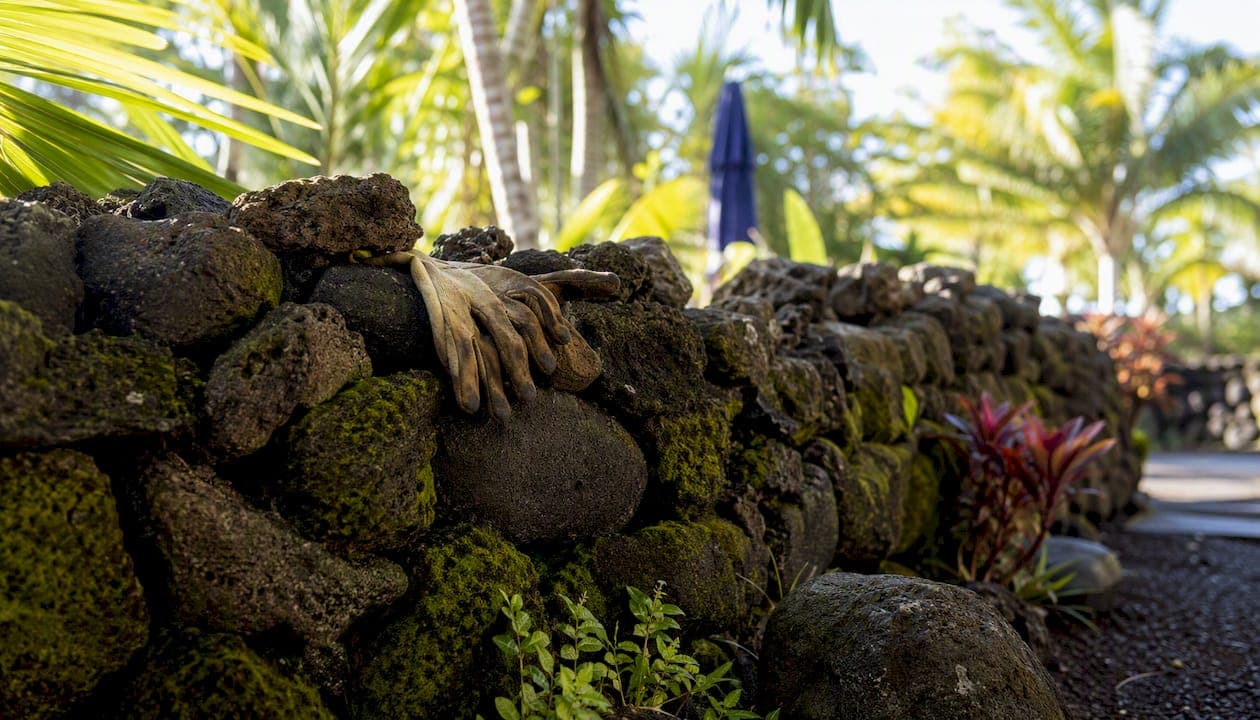
A Hawaiian rock wall is a structure built from volcanic stone, using either the traditional dry-stack method known as uhauhumu pōhaku or modern engineered techniques with mortar and drainage systems, and it serves purposes ranging from ancient agricultural terracing to today's residential retaining and privacy walls. The single most important thing to carry away: these walls are living heritage, and building or restoring one well means respecting both the cultural tradition and current permit requirements. Before you source a single stone, know that removing lava rock is discouraged for cultural and environmental reasons, and many parks and protected areas prohibit it outright.
- Hawaiian rock walls span thousands of years of history, from heiau enclosures to modern retaining walls.
- Two main construction approaches exist: traditional dry-stack (uhauhumu pōhaku) and engineered/mortared walls.
- Permits, cultural sensitivity, and material sourcing rules apply before any project begins.
- The most common materials are lava rock, blue rock (volcanic basalt), moss rock, and coral.
Key Takeaways
Hawaiian rock walls carry both deep cultural heritage and practical engineering logic, and building or visiting one well means honoring both.
| Point | Details |
|---|---|
| Two main construction methods | Traditional dry-stack (uhauhumu pōhaku) uses gravity and interlock; engineered walls add mortar, footings, and drainage for taller or steeper applications. |
| Material choice shapes everything | Moss rock suits decorative walls; blue rock (dense basalt) handles retaining loads; ʻaʻā lava rock offers excellent natural interlock for boundary walls. |
| Permits and engineering thresholds | Walls over roughly 3–4 feet, on steep slopes, or near coastal zones typically require a county permit and a licensed structural engineer's drawings. |
| Never remove lava rock | DLNR and park rules prohibit removing natural resources from protected areas; always source stone from a licensed quarry. |
| Drainage is the make-or-break factor | Proper aggregate backfill and drainage pipe behind any retaining wall are the single biggest determinants of long-term wall survival in Hawaiʻi's climate. |
Table of Contents
- What types of Hawaii rock walls will you actually encounter?
- Why do Hawaiian rock walls matter so much historically?
- What materials and tools go into building a Hawaiian rock wall?
- How are Hawaiian rock walls actually built?
- Why do homeowners in Hawaiʻi build rock walls today?
- What does a Hawaii rock wall project actually cost?
- How do you maintain and repair a Hawaiian rock wall?
- What permits and cultural rules apply to Hawaiian rock walls?
- Where can you see notable Hawaiian rock walls in person?
- How do you plan a rock-wall project and hire the right mason?
- A local perspective on living with Hawaiian rock walls
- Sources
What types of Hawaii rock walls will you actually encounter?
Walk around the Big Island or Oʻahu and you will notice that not all rock walls look alike. The differences go beyond aesthetics. Rock type, construction method, and intended use all shape what you see.
Moss rock is a weathered volcanic stone with a rough, organic surface that collects lichen and moss over time. It has a warm, aged appearance that blends naturally into tropical gardens. Moss rock tends to be pricier than other local stone because of its visual appeal, and it works beautifully for low decorative boundary walls and garden edging.
Blue rock is dense volcanic basalt with a blue-gray color and a relatively smooth face. It is structurally reliable, which makes it a go-to choice for retaining applications where load-bearing capacity matters. The Mokulēʻia Wall, a 95-foot band of volcanic basalt on Oʻahu, is a striking natural example of what blue rock looks like at scale.
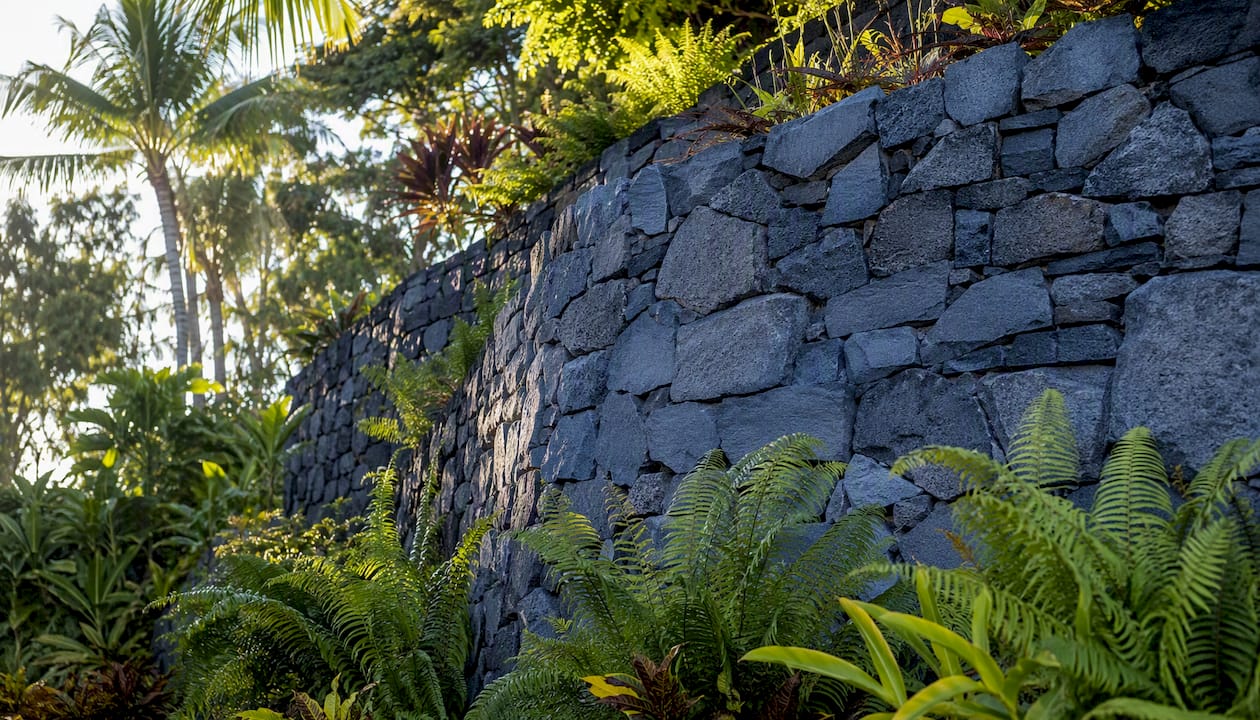
ʻAʻā lava rock is the rough, clinkery lava type with sharp, irregular surfaces. Ancient Hawaiians used it extensively because it was abundant and its jagged texture helped stones interlock. It is harder to work with than smoother stone but produces walls with tremendous character.
Engineered and mortared walls use concrete footings, mortar between stones, and often geogrid or drainage pipe behind the face. They look similar to dry-stack walls from the front but rely on cement chemistry rather than gravity and interlock for their strength.
Pro Tip: When choosing between moss rock and blue rock, think about function first. Blue rock handles slope and water pressure better. Moss rock wins on visual warmth for flat or gently sloped sites.
| Wall type | Best for | Appearance | Durability | Construction method | Maintenance |
|---|---|---|---|---|---|
| Moss rock dry-stack | Decorative boundary, garden edging | Warm, aged, organic | Moderate; suited to low walls | Traditional dry-stack | Periodic stone resetting; vegetation management |
| Blue rock dry-stack | Retaining, boundary, coastal | Clean, gray-blue, historic | High; dense basalt resists pressure | Traditional dry-stack or mortared | Low if drainage is correct |
| ʻAʻā lava rock | Boundary, agricultural style | Rough, dark, textured | High interlock; irregular face | Traditional dry-stack | Low; stones rarely shift if well-laid |
| Engineered/mortared | Steep slopes, tall retaining | Varies by stone face | Very high with proper engineering | Mortared with footing and drainage | Mortar inspection every 5–10 years |
Why do Hawaiian rock walls matter so much historically?
The stone walls at Puʻuhonua o Hōnaunau tell you everything you need to know about why these structures are more than landscaping. They marked sacred boundaries, protected agricultural crops, defined fishpond enclosures, and organized entire communities across the Hawaiian archipelago.
Ancient Hawaiians built rock walls for several distinct purposes:
- Agricultural terraces and loʻi (taro patches) used walls to hold soil, manage water flow, and define planting zones on steep volcanic slopes.
- Boundary markers separated ahupuaʻa (land divisions running from mountain to sea) and indicated kapu zones.
- Heiau enclosures used massive dry-stack walls to define sacred ceremonial spaces; some of these walls stand several feet thick.
- Fishpond walls (loko iʻa) ran along coastlines, using stone to create semi-enclosed ponds for aquaculture.
The technique behind all of this is uhauhumu pōhaku, a gravity-reliant dry-stack method that interlocks stones without mortar and often incorporates an inward-tilting facade (called batter) to resist outward pressure. The structural logic is elegant: each stone shares load with its neighbors, and the slight inward lean uses gravity to keep the wall stable rather than fight it.
Petroglyphs (kiʻi pōhaku), carved directly into lava rock surfaces, are another reminder that volcanic stone carries cultural memory. These archaeological features on the Island of Hawaiʻi must be protected and left undisturbed when you visit any rock formation or wall site.
The archive project Images of Old Hawaiʻi preserves historical photographs of these structures, offering a visual record of how walls looked before modern development changed the landscape. Consulting heritage references like this one gives builders and homeowners a grounded sense of what authentic Hawaiian stonework actually looks like.
What materials and tools go into building a Hawaiian rock wall?
Local masons report that the most common materials are lava rock, blue rock, and coral, and that material choice directly shapes appearance, cost, and long-term maintenance needs.
| Material | Primary purpose | Pros | Cons | Typical appearance |
|---|---|---|---|---|
| Moss rock | Decorative walls, garden borders | Beautiful aged look, locally available | Higher cost, variable sizing | Warm brown-gray, lichen-covered |
| Blue rock (basalt) | Retaining walls, structural faces | Dense, strong, widely available | Heavier to work with | Blue-gray, smooth to slightly rough |
| ʻAʻā lava rock | Boundary and agricultural walls | Excellent interlock, abundant | Sharp edges, irregular sizing | Dark, jagged, rough-textured |
| Coral | Historic coastal walls | Lightweight, historically significant | Fragile, restricted sourcing today | Off-white, porous |
| Concrete/mortar | Engineered retaining walls | High strength, predictable | Loses traditional appearance | Gray, uniform |
| Crushed aggregate | Drainage backfill | Promotes water movement | Not structural on its own | Gray gravel |
| Geotextile fabric | Filter layer behind retaining walls | Prevents soil migration into drainage | Requires correct installation | Not visible in finished wall |
Tools for dry-stack work include mason's hammers, chisels, a level, string lines, a tape measure, and stone tongs or a pry bar for heavier pieces. For larger projects, a mini excavator or skid steer helps with site prep and stone delivery.
Tools for engineered/mortared walls add a concrete mixer or pump, mortar boards, trowels, a vibrating plate compactor for the footing base, and perforated drainage pipe.
Pro Tip: Source stone locally and ethically. Ask your supplier whether the rock was quarried legally and whether it comes from a permitted site. Buying from a licensed quarry protects you legally and keeps costs predictable. Avoid collecting stone from beaches, parks, or roadsides, where removal is often prohibited.
For eco-conscious sourcing ideas that align with sustainable property practices, the Big Island composting and green guide offers useful context on working with the island's natural resources responsibly.
How are Hawaiian rock walls actually built?
The construction approach splits clearly into two paths: traditional dry-stack and engineered retaining. Knowing which one your project needs is the first real decision.
Building a traditional dry-stack wall (uhauhumu pōhaku)
- Clear and level the site. Remove vegetation, roots, and loose topsoil down to firm ground. The base must be stable before any stone goes down.
- Lay the foundation course. Place your largest, flattest stones first. These anchor the wall and distribute weight across the widest possible footprint.
- Apply batter (inward tilt). Each successive course leans slightly inward, typically 1 inch of setback for every 1 foot of height. This is the structural secret of uhauhumu pōhaku: gravity works for the wall, not against it.
- Interlock stones carefully. Each stone should bridge the joint below it, the way brickwork staggers courses. Avoid continuous vertical joints, which create weak planes.
- Use key stones. Long stones placed perpendicular to the wall face (called "through stones" or "tie stones") bind the front and back faces together.
- Backfill with crushed aggregate. Pack gravel behind the wall as you build up. This prevents hydrostatic pressure from building up after rain.
- Cap the wall. Finish with flat capstones to shed water and lock the top course in place.
Engineered retaining wall overview
For walls taller than about 3–4 feet, or on slopes with significant water runoff, an engineered approach is usually required. Local masonry contractors emphasize that foundation preparation, island soil knowledge, and engineered drainage are critical for long-lived walls in Hawaiʻi.
The basic workflow: excavate and compact a concrete footing, build up mortared stone or reinforced concrete courses, install geogrid layers at specified intervals for taller walls, run perforated drainage pipe at the base behind the wall, and backfill with clean aggregate.
When do you need a licensed engineer? If your wall will exceed 4 feet in height, sits on a slope greater than 2:1, retains soil near a structure or roadway, or is located in a coastal or flood zone, you almost certainly need a structural engineer's stamp and a county building permit before breaking ground.
Pro Tip: Never skip the drainage layer. In Hawaiʻi's tropical climate, a wall without proper drainage behind it will fail faster than one built with slightly less precise stonework. Water pressure is the number-one cause of wall failure on the islands.
Why do homeowners in Hawaiʻi build rock walls today?
Modern rock walls serve a range of practical and aesthetic goals, and the right wall type depends on which goal comes first.
- Erosion and slope control is the most common structural reason. Hawaiʻi's volcanic soils can be unstable on grades, and a well-built retaining wall holds the hillside in place during heavy rain.
- Privacy and property boundaries use walls to define space without the visual harshness of fencing. A dry-stack lava rock wall feels natural in a tropical garden setting.
- Landscape curb appeal draws on the island's heritage aesthetic. A moss rock or blue rock wall instantly gives a property a sense of place and history.
- Coastal siting requires extra thought. Salt spray, wave surge, and high groundwater tables all affect material choice and drainage design. Blue rock and engineered systems tend to outperform moss rock in exposed coastal conditions.
- Agricultural and garden use continues the tradition of loʻi walls, with homeowners using low rock borders to define planting beds and manage water flow on sloped lots.
Tropical vegetation is both an asset and a challenge. Fast-growing roots from ficus, bamboo, and other plants can work their way into wall joints over years, slowly displacing stones. Design your planting plan with the wall in mind, keeping aggressive root systems at a safe distance.
What does a Hawaii rock wall project actually cost?
Cost varies widely based on rock type, site access, slope, engineering requirements, drainage, local labor rates, and permit fees. There is no single flat rate, but you can think in three rough tiers.
- Small decorative boundary wall (low, flat site, moss rock or lava, no engineering required): labor and materials for a straightforward project like this are influenced primarily by stone cost and the number of linear feet. Moss rock commands a premium over ʻaʻā lava because of its visual appeal and the care required in placement.
- Medium retaining wall (3–4 feet tall, moderate slope, blue rock or engineered): adds drainage materials, possible permit fees, and more intensive labor. Site access on a steep or remote lot can add significantly to the total.
- Large engineered retaining wall (over 4 feet, steep slope, structural engineer required): the engineer's fee, permit costs, concrete footing, geogrid, and drainage pipe all stack on top of stone and labor costs. This tier can run substantially higher than a decorative wall of the same length.
Key cost drivers to discuss with any contractor:
- Rock type and sourcing distance
- Site access (can a truck deliver stone directly, or does it need to be hand-carried?)
- Slope and soil stability
- Drainage system complexity
- County permit fees and engineering stamp requirements
- Contractor lead times, which in Hawaiʻi can run several weeks to months depending on demand
Timeline bullets:
- Site prep and drainage assessment: 1–3 days for a small project
- Permit approval (if required): 2–8 weeks depending on county and project complexity
- Build phase for a small-to-medium wall: 3–10 days of active construction
- Contractor scheduling lead time: often 4–12 weeks in Hawaiʻi's active construction market
If your project is near an HOA-governed property, check Hawaii HOA rules and notice requirements before you finalize your design, since visible landscape changes often require HOA approval alongside county permits.
How do you maintain and repair a Hawaiian rock wall?
A well-built dry-stack wall can last generations with minimal intervention. The key is catching small problems before they become structural ones.
Regular maintenance checklist:
- Clear drainage outlets and weep holes after heavy rain to prevent water buildup behind the wall.
- Pull vegetation from wall joints before roots establish. Small plants are easy to remove; established roots are not.
- Inspect mortar joints on engineered walls annually and repoint any cracked or missing sections before water infiltrates.
- Walk the wall face after any significant earthquake and look for displaced or tilted stones.
- Check the cap course each year; capstones take the most weather exposure and are the first to shift.
Common failure modes and repairs:
- Bulging face: usually caused by water pressure or root intrusion. Reset the affected section after clearing the cause.
- Settlement at the base: often a drainage or foundation issue. Rebuilding the base course is usually necessary.
- Mortar deterioration: repoint with a mortar mix appropriate for the stone type; avoid overly rigid Portland cement mixes on older walls, which can cause spalling.
- Undermining by water: install or improve drainage pipe behind the wall and regrade the uphill surface to direct runoff away.
Pro Tip: For dry-stack walls, a little movement is normal and not always cause for alarm. What you are watching for is progressive lean, a section that moves noticeably between inspections, or stones that have dropped out of the face entirely. Those are the signs that call for a mason.
A dry-stack wall with good drainage and no aggressive root intrusion can last well over a century in Hawaiʻi's climate. Mortared walls depend heavily on the quality of the original mix and the drainage design; poor drainage is the fastest path to premature failure in a tropical environment.
What permits and cultural rules apply to Hawaiian rock walls?
Building a rock wall in Hawaiʻi is not purely a construction question. Legal and cultural considerations shape what you can build, where, and with what materials.
Permitting basics:
- Most counties in Hawaiʻi require a building permit for retaining walls over a certain height (commonly 3–4 feet, but check your specific county's rules).
- Walls near coastal zones, streams, or state lands may require additional approvals from the State Land Use Division or the Office of Planning.
- Engineered walls require a licensed structural engineer's stamped drawings before a permit is issued.
- If your project is near an HOA boundary, review how to respond to HOA letters in Hawaii if you receive a notice about your project.
Cultural sensitivity:
- Wahi kūpuna (ancestral places) and archaeological features must not be disturbed. If you encounter stone alignments, platforms, or petroglyphs during excavation, stop work and contact the State Historic Preservation Division (SHPD).
- Consultation with Native Hawaiian community members and organizations is encouraged for any project that may affect cultural landscapes.
The rule on removing lava rock:
- DLNR guidance and park rules strongly discourage removing natural resources, including lava rock, from the islands.
- In national and state parks, removing any natural material is prohibited by law.
- Even on private land, sourcing stone from undesignated areas can carry legal risk. Always use a licensed quarry or permitted supplier.
Where can you see notable Hawaiian rock walls in person?
Seeing real examples in the field teaches you more than any guide can. Here are the most accessible and well-documented sites.
- Puʻuhonua o Hōnaunau National Historical Park (Big Island): The stone walls here are among the finest surviving examples of ancient Hawaiian dry-stack construction. The Great Wall, which once separated the puʻuhonua (place of refuge) from the royal grounds, is massive and remarkably intact. Entry fees apply; check the NPS site for current hours.
- Mokulēʻia Wall (Oʻahu): A 95-foot band of volcanic basalt on Oʻahu's North Shore with many established sport and trad climbing routes. This is a natural cliff face, not a constructed wall, but it is the best place in Hawaiʻi to see blue rock at its most dramatic. Access is managed by the Hawaii Climbing Coalition; follow their current permit and membership guidance before visiting.
- The Arch (Oʻahu): A coastal bouldering area accessible only at low tide and after dry conditions. Holds can stay damp for days after rain, so check conditions carefully. Bring multiple pads and spotters for bouldering here.
- Historic agricultural walls, South Kona (Big Island): The slopes above Captain Cook and Kealakekua Bay are dotted with remnant agricultural walls from traditional Hawaiian farming. Many are visible from hiking trails and roadside pullouts. Observe without touching or climbing.
Visiting guidance for all sites:
- Stay on designated trails and do not climb or sit on historic walls.
- Do not remove any stone, even loose-looking pieces.
- Photograph freely but keep a respectful distance from any archaeological features.
- Follow Leave No Trace principles: pack out everything you bring in.
| Site | Type | Island | Access notes |
|---|---|---|---|
| Puʻuhonua o Hōnaunau NHP | Historic dry-stack walls | Big Island | NPS entry fee; open most days |
| Mokulēʻia Wall | Natural basalt climbing band | Oʻahu | HCC permit/membership required |
| The Arch | Coastal bouldering | Oʻahu | Low-tide access only; dry conditions needed |
| South Kona agricultural walls | Historic boundary/farm walls | Big Island | Visible from trails; no climbing |

How do you plan a rock-wall project and hire the right mason?
A clear plan before you call a contractor saves time, money, and frustration. Work through this checklist first.
Project planning checklist:
- Define the wall's purpose (retaining, decorative, boundary) and approximate dimensions.
- Take photos of the site from multiple angles, including the slope above and below the proposed wall line.
- Note drainage patterns: where does water flow during heavy rain?
- Research your county's permit requirements for the wall height you are planning.
- Set a realistic budget range, including a contingency for drainage and engineering if needed.
- Decide on stone type based on appearance goals and structural needs.
Questions to ask any mason or contractor:
- How many Hawaiian rock wall projects have you completed, and can you provide local references?
- Are you licensed and insured in Hawaiʻi, and do you carry general liability coverage?
- Will you handle permit applications, or is that the owner's responsibility?
- How do you handle drainage behind retaining walls?
- What is your warranty on labor and materials?
- Can you provide a written, itemized estimate?
Red flags to watch for:
- No written estimate or a vague "time and materials" quote with no ceiling.
- Unwillingness to pull permits ("we can skip that to save money").
- No local references or a contractor who has never worked with Hawaiian stone specifically.
- Pressure to decide immediately or to pay a large deposit before any work begins.
Local masonry contractors who specialize in Hawaiian stone bring knowledge of island soil conditions, local stone sourcing, and the drainage challenges specific to volcanic terrain. That local expertise is worth prioritizing over a lower bid from someone unfamiliar with the islands.
For readers planning a visit to the Big Island to see walls in person and explore the region, Luana inn's vacation packages include options that put you right in the heart of South Kona, close to Puʻuhonua o Hōnaunau and the historic agricultural walls of the Kealakekua area.
A local perspective on living with Hawaiian rock walls

You do not have to be a mason to develop a deep appreciation for Hawaiian rock walls. Spend a few mornings on the Big Island watching the light move across a dry-stack lava wall, and you start to understand what these structures are really doing. They are not just holding soil. They are holding memory.
What strikes me most about the walls around Kealakekua Bay is how quietly they communicate the intelligence of the people who built them. No mortar, no machinery, and yet some of these walls have outlasted every modern structure nearby. The inward tilt, the careful interlock, the choice of stone for each position: it is a kind of engineering that rewards patience and observation.
If you are visiting the Big Island and want to see a representative wall responsibly, the path above Puʻuhonua o Hōnaunau is the most accessible and most rewarding. Walk slowly. Look at how the stones sit against each other. Notice the slight lean toward the hillside. Then ask a ranger or a local steward what they know about who built it and when. That conversation is often the best part of the visit.
Luana inn sits in the foothills above Kealakekua Bay, and guests regularly ask about the stone walls they see along the road. We are always happy to point you toward the best spots to look, and our rooms and accommodations put you within easy reach of the most historically significant walls on the island.
Sources
These are the strongest reference pages used for this guide, each covering a distinct aspect of Hawaiian rock walls.
- DLNR | Hawaii Department of Land and Natural Resources
- Rock Walls in Hawaii: Cultural Heritage and Construction Tips with Tiva Tatofi | KHON2
- Mokulēʻia Wall • Hawai'i Climbing Coalition
- Uhauhumu Pōhaku | Kumukahi
Cultural resources like these belong to the communities that created them. Use them with respect, cite them accurately, and support the organizations that maintain them.