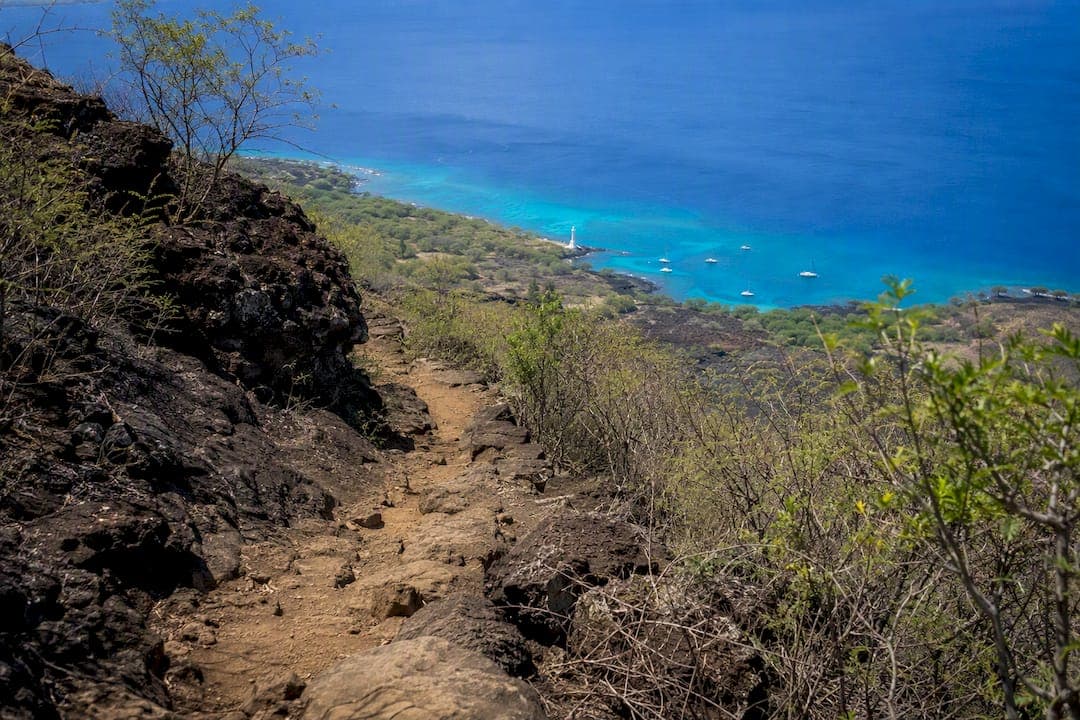
The Captain Cook Monument hike is a strenuous 3.7 to 3.8 mile round-trip trek with roughly 1,256 to 1,300 feet of elevation gain, nearly all of it waiting for you on the climb back out. This is a real hike, not a stroll, and fit hikers should plan on it accordingly.
- Start before 7:00 AM to beat the heat
- Carry at least 2 liters of water per person
- Wear closed-toe hiking shoes with real traction
- No fee, no permit, no reservation required
Quick fact: Most rescues on this trail happen from dehydration during the return climb, not from getting lost. If a similar round trip with a steep, exposed uphill finish sounds like more than you want, a kayak rental or boat tour gets you to the same historic cove without the descent and ascent.
Key Takeaways
Success on the Captain Cook Monument hike depends on starting early, carrying enough water, and respecting the return climb as the trail's real challenge.
| Point | Details |
|---|---|
| Distance and elevation | Expect 3.7 to 3.8 miles round trip with about 1,256 to 1,300 feet of gain on the return. |
| Water is non-optional | Carry at least 2 liters per person; dehydration causes most rescues on this trail. |
| Timing drives success | Start by 6:00 to 7:00 AM to beat heat, crowds, and catch dolphin activity before 10:00 AM. |
| Alternatives exist | Kayak rentals and boat tours reach the same cove without the climb, at added cost. |
| No permits needed | Hiking is free and open year-round, but avoid the trail after heavy rain. |
Table of Contents
- Captain Cook Monument Hike at a Glance
- What to Expect on the Trail: Terrain and Hazards
- Getting to the Trailhead: Parking and Timing
- Safety and Gear Checklist Before You Go
- Snorkeling at Kealakekua Bay: What to Know
- Boat Tours and Kayak Rentals: The Easier Ways In
- Best Time of Year and Time of Day to Hike
- Sample Half-Day Itinerary from Kailua-Kona
- Local Insider Tips from Luana Inn
- The Story Behind the Captain Cook Monument
- Route Description: Landmarks Along the Way
- Permits and Regulations You Should Know
- What to Pack: Gear Checklist for the Hike
- An Editorial Take on This Hike
- Ready to Base Your Hike Nearby?
- Sources
Captain Cook Monument Hike at a Glance
Here's the trail broken down into the numbers that actually shape your planning:
- Distance: 3.7 to 3.8 miles round trip, out-and-back
- Elevation gain: About 1,256 to 1,300 feet, almost entirely on the return leg
- Time: Roughly 2.5 to 3 hours for most hikers, longer if you snorkel at the bottom
- Difficulty: Rated hard/strenuous on AllTrails, with user reviews consistently calling out loose rock and a punishing final push
The descent feels deceptively easy. That's exactly the trap. You're losing over a thousand feet of elevation on the way down, which means you're gaining every bit of it back on tired legs in full sun.
What to Expect on the Trail: Terrain and Hazards
The path down to Kealakekua Bay runs over loose volcanic scree and broken lava rock for most of its length. Footing shifts under you more than you'd expect, and rolling stones on the steeper switchbacks catch a lot of hikers off guard, especially near the bottom where the grade steepens.
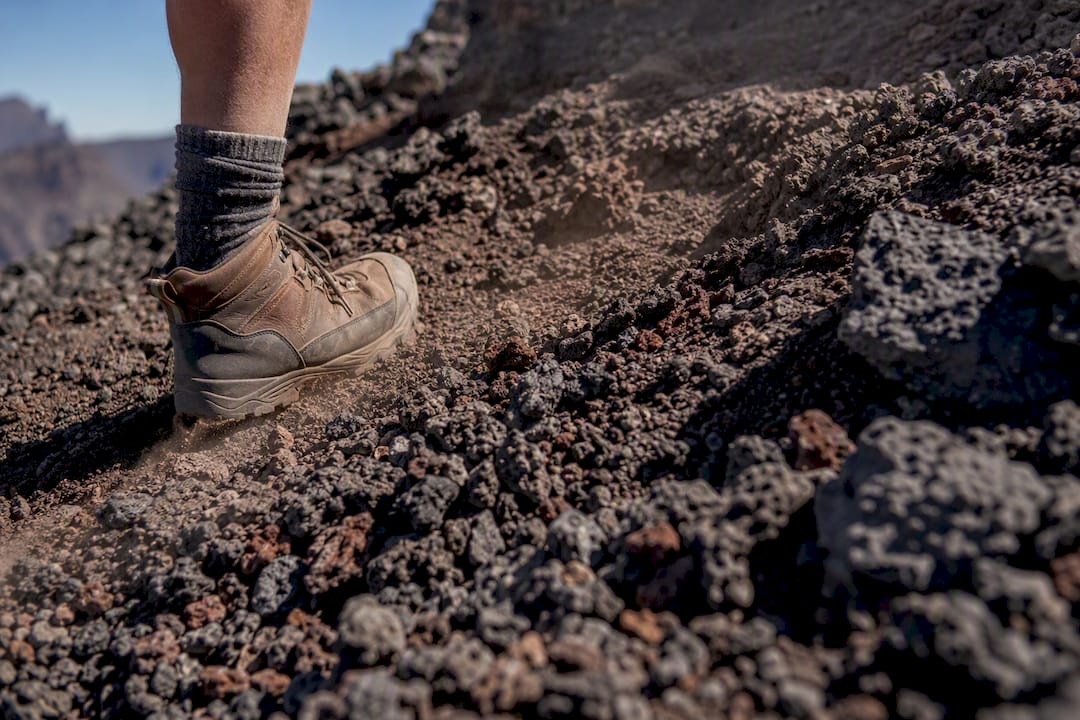
Shade is scarce. Long open stretches expose you to direct sun on both legs of the hike, but the return climb is where that heat exposure actually hurts, since you're working harder and moving slower.
You'll likely spot feral goats along the upper slopes, and mongoose occasionally dart across the trail lower down. Neither poses a real threat, but tall grasses flanking parts of the route mean long pants or gaiters are worth considering if you're prone to scratches or ticks.
- Loose scree and lava rock demand full attention, especially on switchbacks
- Shade is minimal to nonexistent for most of the route
- Feral goats and mongoose are common but harmless
- Tall grass sections favor covered ankles and shins
Pro Tip: Trekking poles help more on the way up than the way down. Save your arm strength for the ascent, when stable footing matters most.
Getting to the Trailhead: Parking and Timing
The trailhead sits off Napoopoo Road, just past its junction with Mamalahoa Highway on Hawaii's Big Island. Here's how to plan the drive and arrival:
- Set your navigation for Napoopoo Road and watch for the small trailhead pullout, it's easy to miss on the first pass.
- Arrive by 6:30 to 7:00 AM. Roadside parking is limited to a handful of spots, and it fills fast once other hikers and snorkelers show up.
- If you're relying on a ride-hailing service, confirm your driver knows the area. Coverage can be spotty this far from Kailua-Kona, and pickup after your hike may take longer than expected.
- No permits, reservations, or fees apply to hiking the trail itself.
- Lock your car and avoid leaving valuables visible. It's a quiet trailhead, but that's exactly the kind of spot opportunists target.
Once you're parked, the trail entrance is easy to find, but there's no ranger station or signage system like you'd find at a national park visitor center.
Safety and Gear Checklist Before You Go
Dehydration causes most of the trouble hikers run into here, not injuries or getting lost. Guides consistently point to water quantity, at least 2 liters per person, as the single biggest factor separating a good hike from a bad one.
Pack for the return climb, not just the walk down:
- Minimum 2 liters of water per person, more if you're hiking after 8:00 AM
- Closed-toe hiking shoes with solid tread; sandals and flip-flops are a common cause of turned ankles on the scree
- Reef-safe sunscreen, a hat, and sun-protective clothing
- Basic first-aid supplies (blister care, antiseptic wipes)
- Trekking poles, optional but useful on tired legs
- A dry bag or sealed container for valuables, since mongoose and goats will investigate anything left unattended near the shoreline
Pro Tip: Freeze one of your water bottles the night before. It stays cold for the first hour and slowly thaws into drinkable water by the time you need it most, on the climb back up.
Snorkeling at Kealakekua Bay: What to Know
Kealakekua Bay earns its reputation as one of the best snorkel spots on the Big Island. Protected as a Marine Life Conservation District, it holds dense fish populations, strong visibility, and frequent spinner dolphin activity, plus regular green sea turtle sightings near the rocky shoreline.
The protected status comes with real rules, not suggestions:
- Fishing is prohibited throughout the conservation district
- Federal guidelines require keeping distance from resting spinner dolphins, don't approach or swim toward pods
- Reef-safe sunscreen is strongly encouraged to protect coral health
Timing tip: Snorkel before the tour boats arrive, typically before 10:00 AM. Water stays calmer, visibility holds up better, and dolphin encounters are far more likely earlier in the morning before boat traffic picks up.
Boat Tours and Kayak Rentals: The Easier Ways In
If the climb back out doesn't appeal to you, boat tours and kayak rentals both reach the same cove without the elevation work.
- Boat tours cost significantly more per person but include gear, a guide, and more time in the water
- Kayak rentals are typically less expensive and provide self-paced, independent access, provided you're comfortable paddling open water
- Choose the hike if you want to see the monument's inscription up close and value the independence of walking in on your own schedule
- Choose a boat or kayak if you're traveling with kids, short on time, or simply not up for a strenuous round-trip climb
Best Time of Year and Time of Day to Hike
April through October generally brings the most reliable conditions for this hike, though Hawaii's weather can shift fast at any time of year.
- Avoid the trail soon after heavy rain; the volcanic scree turns slick and genuinely dangerous underfoot
- Start at dawn, between 6:00 and 7:00 AM, to beat both the heat and the crowds
- Dolphin activity tends to peak before 10:00 AM, so an early start doubles as your best wildlife window
- Postpone entirely if there's been recent heavy rain or an active severe weather advisory
Sample Half-Day Itinerary from Kailua-Kona
A realistic half-day plan, with room to breathe:
- 6:00 AM: Depart Kailua-Kona, roughly 30 to 40 minutes to the trailhead
- 7:00 AM: Begin the descent, hydrating steadily rather than waiting until you're thirsty
- 7:45 AM: Arrive at Kealakekua Bay, snorkel for 45 minutes to an hour while the water's calm
- 9:00 AM: Start the ascent in short segments, resting every 10 to 15 minutes
- 10:15 AM: Reach the trailhead, add a 30 to 45 minute buffer for parking delays or unexpected slowdowns
Pair the hike with a stay nearby so you're not adding a long drive on top of a tiring morning.
Local Insider Tips from Luana Inn
Staying close to the trailhead changes the whole experience. You skip the long drive from Kailua-Kona and get to the trail while it's still cool and quiet.
- Check our dolphin-viewing guide for the best morning windows before boat traffic picks up
- Our Ka'awaloa trail notes cover current trail chatter and conditions worth knowing before you go
- Ke'ei Beach makes a quieter alternative if the main trailhead parking is full
- Rinse gear and cool off back at your accommodation rather than fighting for space at a public rinse station
| Point | Details |
|---|---|
| Location advantage | Staying near Kealakekua Bay cuts your drive time and lets you start the hike earlier. |
| Recovery matters | A pool or soak after a strenuous climb helps more than most hikers expect. |
The Story Behind the Captain Cook Monument
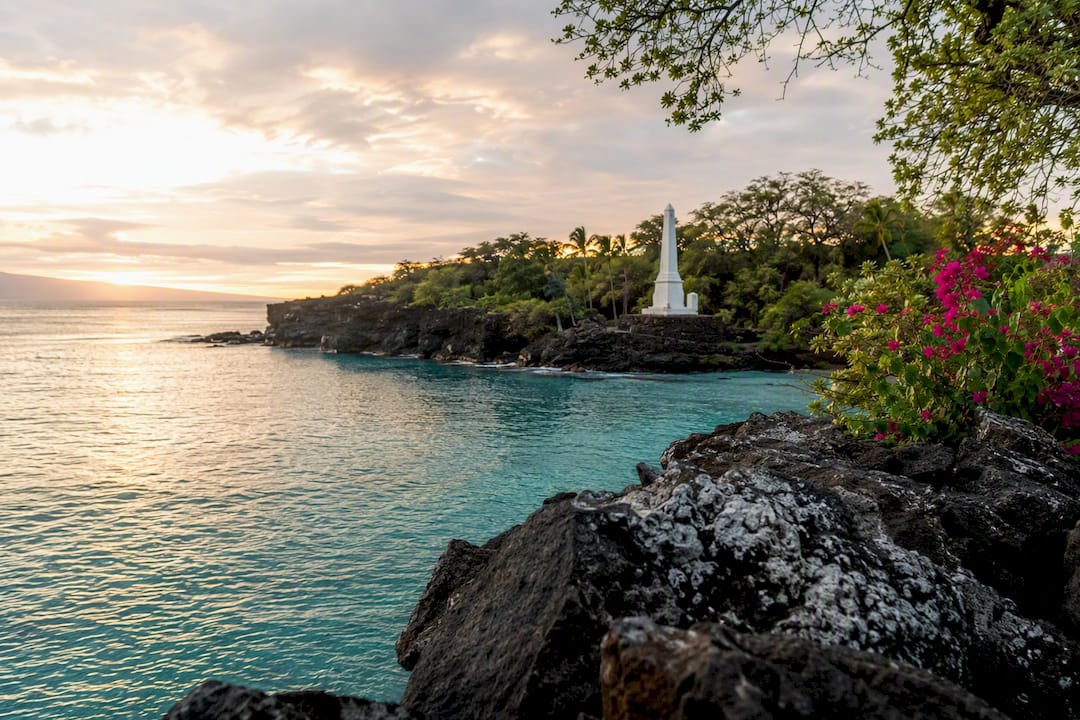
The white obelisk marking Ka'awaloa Cove commemorates British explorer Captain James Cook, who died at this spot in February 1779 during a violent confrontation with Native Hawaiians. The monument stands on land owned by the United Kingdom, a result of historical diplomacy. It was erected in 1874, funded partly by British subscribers who sought a permanent marker.
For history-minded hikers, the monument offers more than a photo opportunity. Kealakekua Bay was a significant Hawaiian settlement long before Cook's arrival, and the surrounding area holds cultural and archaeological weight tied to Native Hawaiian history that predates European contact by centuries. Ruins of an ancient heiau, a Hawaiian temple platform, sit near the cove, though little formal signage explains their significance on-site.
Walking the trail connects two very different stories at once, one of Pacific exploration and its violent end, the other of a Hawaiian community whose history stretches back far longer. That layered context is part of what separates this hike from a simple nature walk, and it's worth reading up on before you go so the monument means something beyond its stark white silhouette against the cove's blue water.
Route Description: Landmarks Along the Way
The trail begins at a modest, easy-to-miss pullout off Napoopoo Road, marked mostly by a worn dirt path cutting into the brush rather than any formal signage. From the trailhead, you descend almost immediately, losing elevation steadily through the first mile as the surrounding vegetation shifts from dry scrub to increasingly rocky terrain.
Around the halfway point, the trail crosses through several switchbacks where footing gets loose and attention matters most. This section is where most hikers slow down, picking careful steps over broken lava rock rather than moving at a steady pace.
As you near the bottom, the path opens up to reveal your first real view of Kealakekua Bay's turquoise water, a payoff moment that most trip reports single out as worth the effort alone. The final stretch levels out near the shoreline, where you'll find the white monument obelisk standing just off the rocky point, along with informal snorkel entry spots nearby.
The return trip retraces the same path in reverse, but the switchback section that felt manageable on the way down becomes the trail's real test on the way back up, steeper and more exposed than it appeared from below. Budget extra time here rather than rushing.
Permits and Regulations You Should Know
Hiking the Captain Cook Monument trail itself requires no permit, no reservation, and no entrance fee. Access remains open to the public year-round, which is part of why it draws steady foot traffic despite its difficulty.
That said, the water below the trail falls under different rules entirely. Kealakekua Bay State Historical Park is managed by Hawaii's Department of Land and Natural Resources, and its Marine Life Conservation District status brings real restrictions once you're in the water. Fishing is banned throughout the protected area, and federal guidelines govern how closely you can approach resting spinner dolphins, a rule enforced because repeated human disturbance interrupts the dolphins' daytime rest cycles.
Weather-related closures aren't common but do happen after major storms or flooding, when the trail's volcanic scree becomes genuinely hazardous. There's no central alert system for hikers, so checking current conditions before you drive out saves a wasted trip. If you're combining the hike with travel from outside Hawaii, it's worth reviewing travel insurance options that cover trip interruption or medical evacuation, since remote trailheads like this one sit well outside easy reach of urgent care.
What to Pack: Gear Checklist for the Hike
Pack light, but pack right. This is a trail where the wrong gear choice, not bad luck, causes most problems.
Water and hydration:
- At least 2 liters per person, more if hiking after sunrise
- A hydration bladder or accessible bottle holster for the climb
Footwear and clothing:
- Closed-toe hiking shoes with real tread, not trail runners with worn soles
- Moisture-wicking clothing, plus long pants if you want protection from tall grass
- A hat and sun-protective layers for the shadeless stretches
Snorkel and water gear:
- Mask, snorkel, and fins if you're not renting at the bay
- Reef-safe sunscreen, applied before you start descending
- A dry bag for your phone, keys, and wallet during your swim
Extras worth the weight:
- Trekking poles for the ascent
- Basic first-aid kit
- A frozen water bottle that thaws into cold drinking water
- Cash for any informal parking arrangements or gear rentals near the trailhead
If you're staying at Luana Inn, you can prep the night before with a good breakfast and store extra gear securely rather than packing everything into a rental car.
An Editorial Take on This Hike
Most guides treat this trail like a checklist item, get to the monument, snorkel, leave. That framing undersells what actually makes the hike worth doing: the history at the bottom is inseparable from the physical effort of getting there. Skip the climb entirely, and you get a nicer boat ride, not a better understanding of the place.
Where conventional advice falls short is timing. Plenty of guides mention an early start without explaining why it matters twice over, both for heat and for the narrow window before spinner dolphins retreat from boat traffic. Miss that window and you've lost half the reason to hike instead of drive around by boat.
If you're deciding what to prioritize, put water quantity above speed. Nobody regrets moving slowly with enough water. People do regret running dry a mile from the car with the sun climbing. The trail rewards patience far more than fitness alone.
— Nicole
Ready to Base Your Hike Nearby?
Staying close to Kealakekua Bay turns this hike from a long day trip into a relaxed half-day outing. At Luana Inn, you're a short drive from the trailhead, with a farm-to-table breakfast to fuel up beforehand and a chlorine-free pool, hot tub, and infrared sauna waiting when you're back and ready to recover. Browse our vacation packages to pair your hike with a wellness treatment or a few extra days exploring the Kona coast.
Sources
- Kealakekua Bay – Big Island Hikes
- CAPTAIN COOK MONUMENT (KA'A'WALOA) TRAIL - TheHikingHi
- Kaʻawaloa - Captain Cook Monument Trail — AllTrails
- Kealakekua Bay State Historical Park — Hawai‘i DLNR
- Captain Cook Monument Trail: The Honest Hiker's Guide to Kealakekua Bay — Big Travel Guides